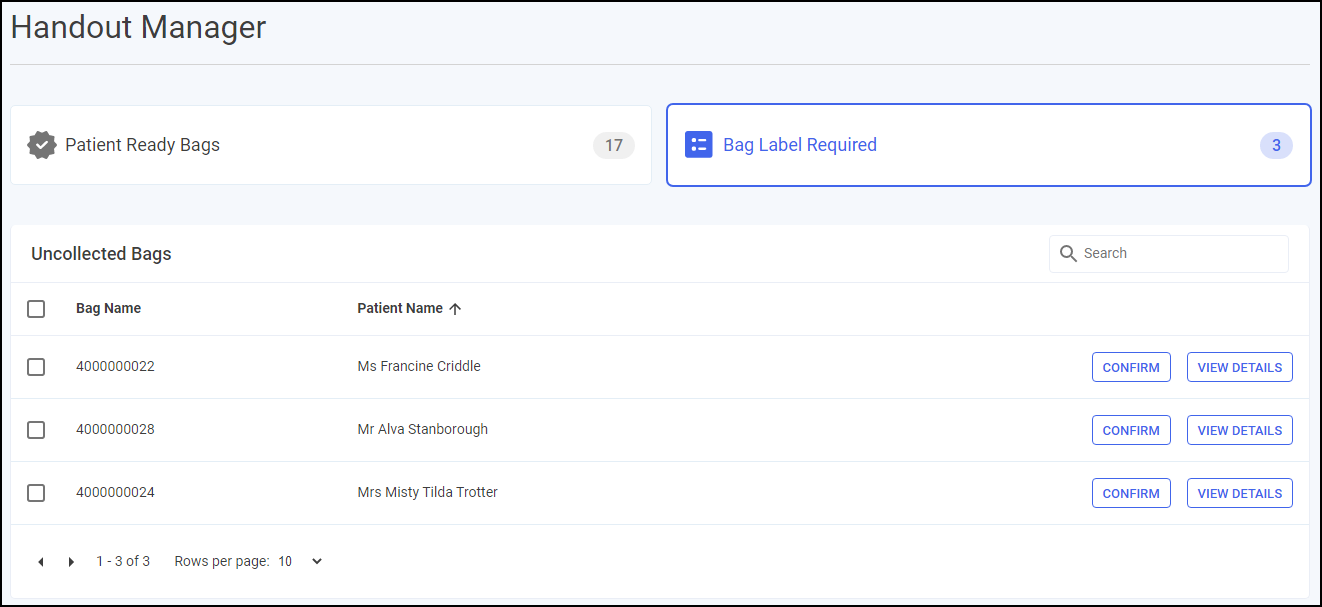
Uncollected Bags
The Uncollected Bags screen displays your uncollected bags within Pharmacy Manager whether assigned to a location or not.
Accessing the Uncollected Bags Screen
-
From Pharmacy Manager, from the select Uncollected Bags
 .
.The Uncollected Bags screen displays.
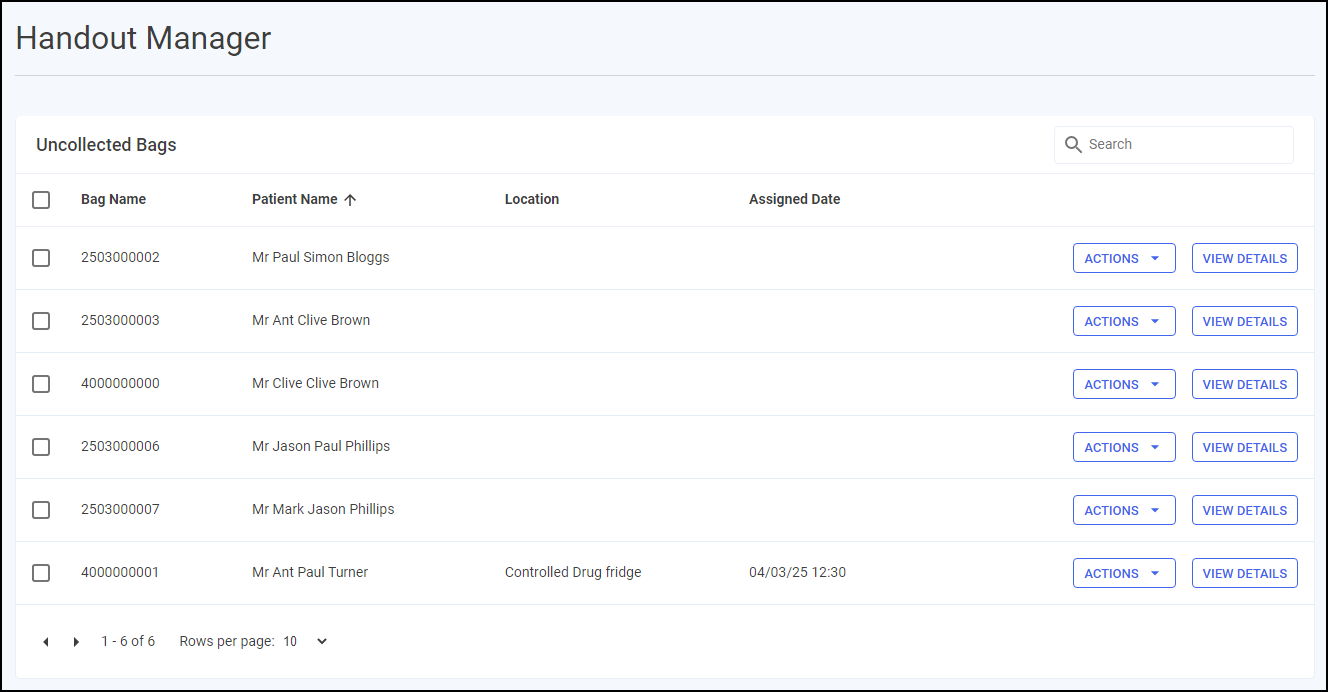
The screen includes two tabs:
-
Patient Ready Bags - Displays all uncollected bags within Pharmacy Manager and, if applicable, the assigned location.
See Patient Ready Bags for details.Note - Bags that require new bag labels do not display in this list, instead they display in Requires Bag Labels and require action before they can be handed out. -
Requires Bag Labels - Displays bags created for items marked as Collect Later during part supply and require a new bag and label.
See Requires Bag Labels for details.
-
When a bag is collected, either by Handout Manager or in Pharmacy Manager, it is removed from this screen.
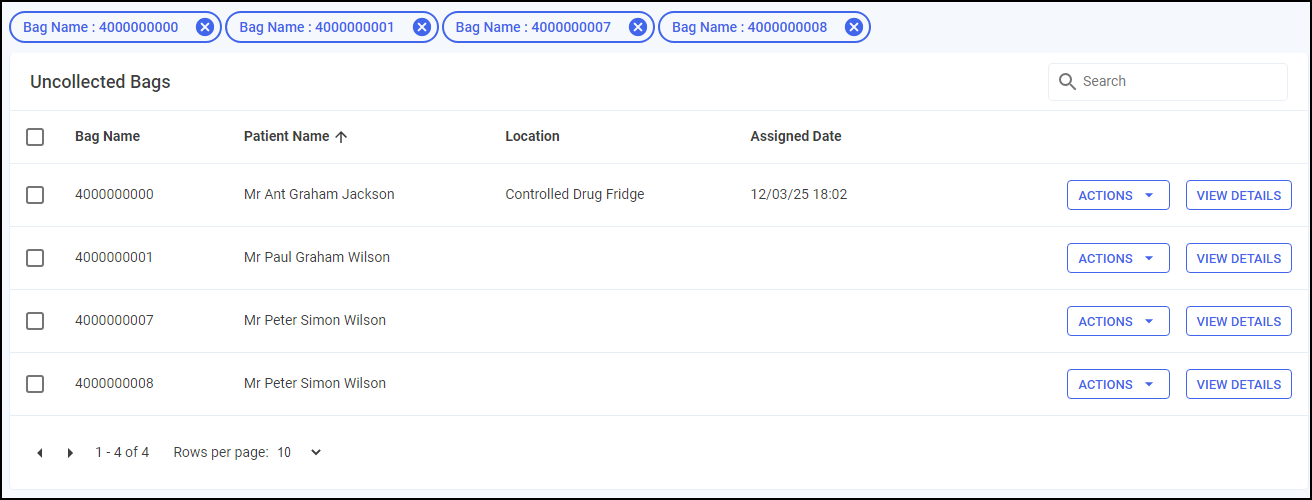
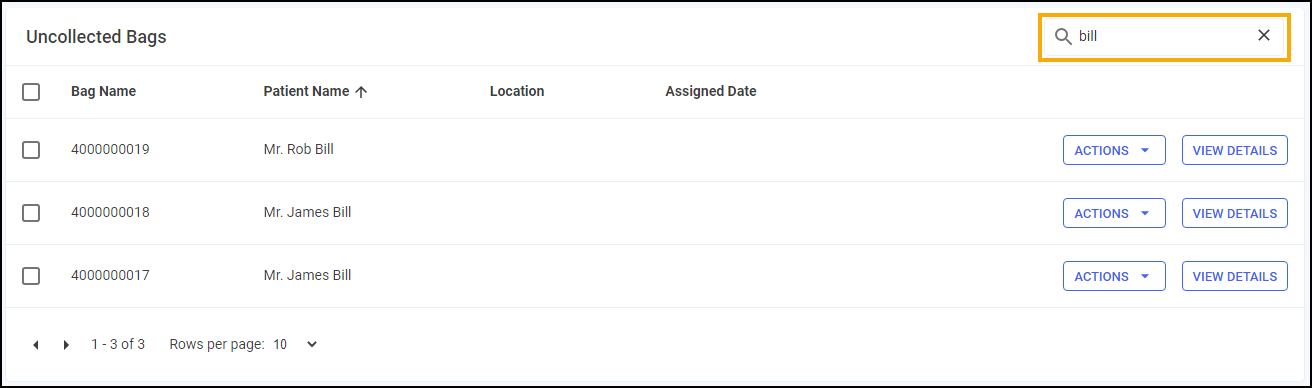
Searching for Bags
To search for a bag, either:
-
Scan the bag label with your wired barcode scanner (not the Handout Manager device) to locate the bag in the list, or
-
Enter the patients name into Search, the list updates as you type.
Patient Ready Bags
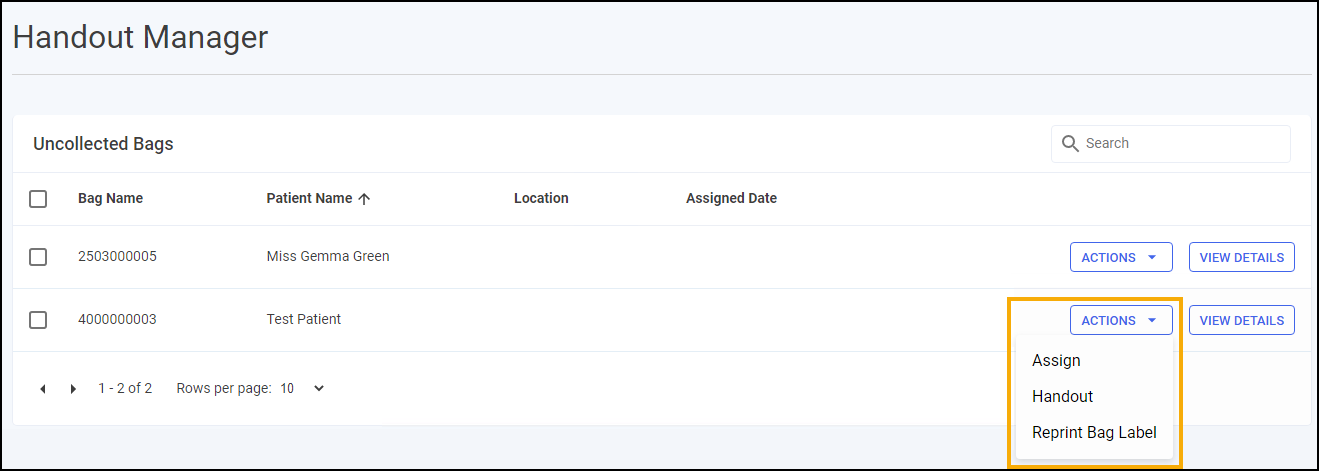
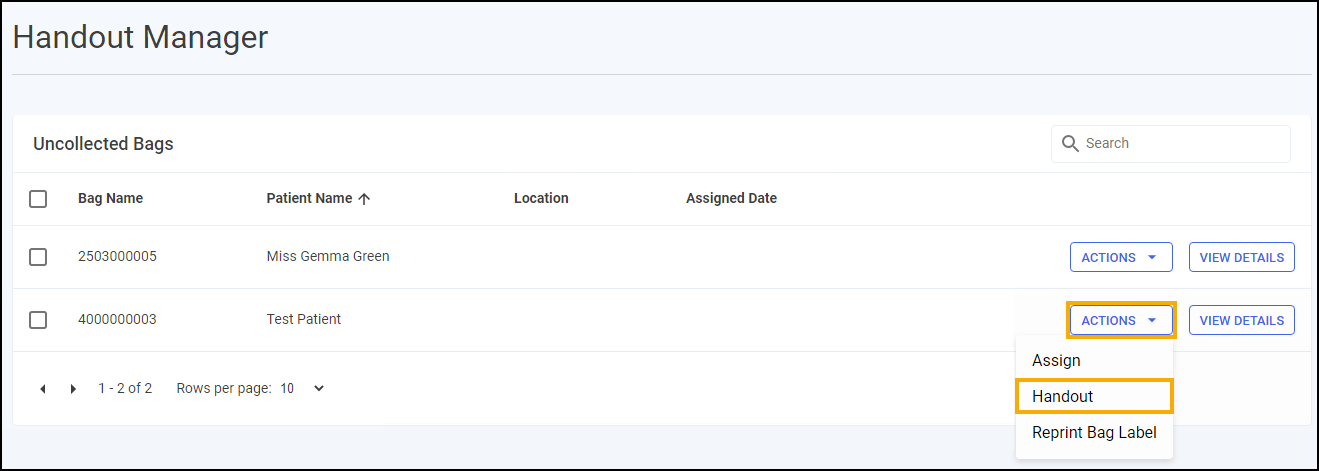
For each individual bag you have the following options:
-
ACTIONS:
-
Assign - Select to assign the bag to a location. This is available for all bags, whether the bag is already assigned to a location or not.
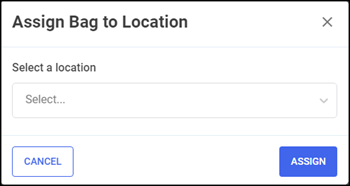
Type or choose the location from the available list and then select ASSIGN
 before placing the bag in that location.
 -
Handout - Select to manually handout the bag.
See Manually Handing out Bags below for details.Remember - You can also handout using the Handout Manager hand held device. -
Reprint Bag Label - Select to reprint the bag label.
-
-
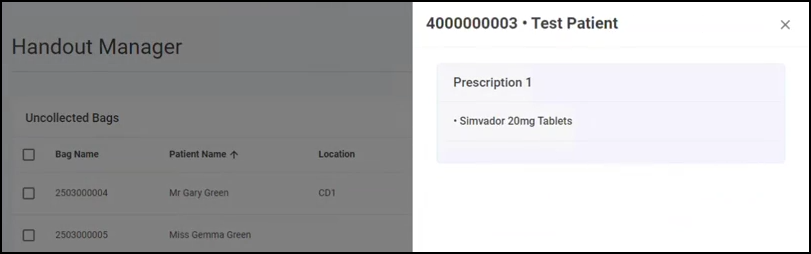
VIEW DETAILS - Select to view the bag details, this displays the bag ID, the patient's name, and the details of prescriptions within the bag.
Manually Handing out Bags
To manually handout a bag from the Uncollected Bags screen:
-
From the Uncollected Bags screen, select ACTIONS - Handout.
-
The Bag Details screen displays for the patient, with each bags listed and, if assigned, their location. Locate all bags listed if more than one.
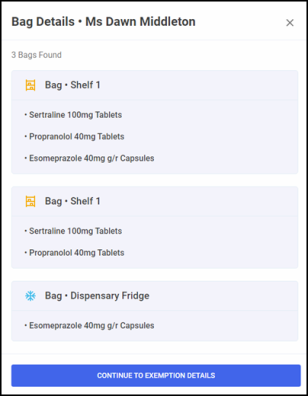 Training Tip - If a bag is not yet assigned a location it displays as Bag•Unassigned Location.
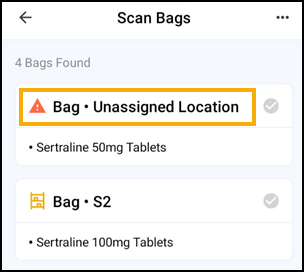
Select CONTINUE TO EXEMPTION DETAILS .
-
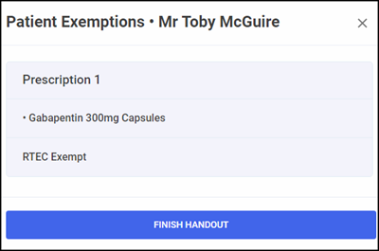
If an Electronic Prescription Service (EPS) prescription is being handed out the Patient Exemptions screen displays:
-
If the exemption is eligible for Real Time Exemption Checking (RTEC), the patient is exempt you are advised that they are RTEC Exempt, select FINISH HANDOUT
 .
.
-
If the exemption is not eligible for RTEC, then you are required to confirm the exemption status. This screen displays for each individual prescription so may display multiple times.
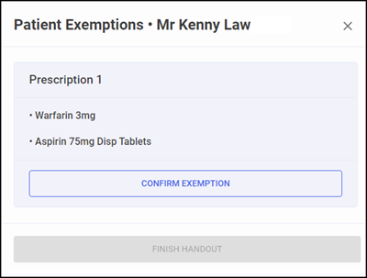
To confirm exemptions, or set as not exempt:
-
Select CONFIRM EXEMPTION
 .
. -
Select the correct exemption category from the list and if the evidence was provided. Select CONFIRM
 to continue.
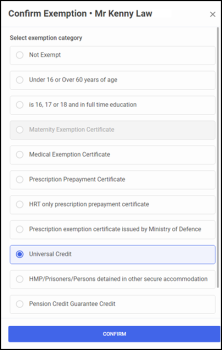
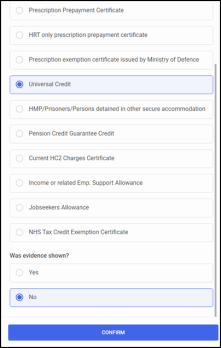 Note - Was evidence shown is not required if the patient is not exempt.
 -
The Patient Exemptions screen displays detailing the selected exemption category.
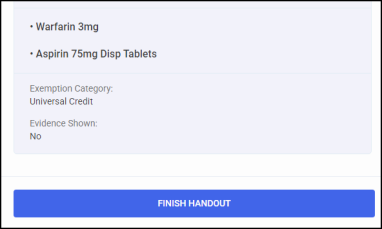
Select FINISH HANDOUT
.
-
-
-
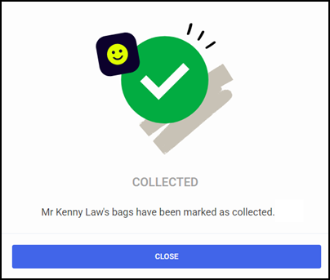
The Collected screen displays select CLOSE
 .
.
Requires Bag Labels
The Requires Bag Labels tab displays bags created for items marked as Collect Later during part supply and require a new bag label.
For each individual bag you have the following options:
-
CONFIRM - Opens the Bag Management screen, this provides you with the opportunity to sort the remaining items into multiple bags if required. Select
 to confirm the bags, a new bag label prints. You now must label the bags and assign the bag to a location, even if you are returning it to the same location as before.See Bag Management and Assigning Bags to Locations for details.
 -
VIEW DETAILS - Select to view the bag details, this displays the bag ID, the patient's name, and the details of prescriptions within the bag.